Egypt Valley · Spring 2023
A richer brown, without replacing the oak.
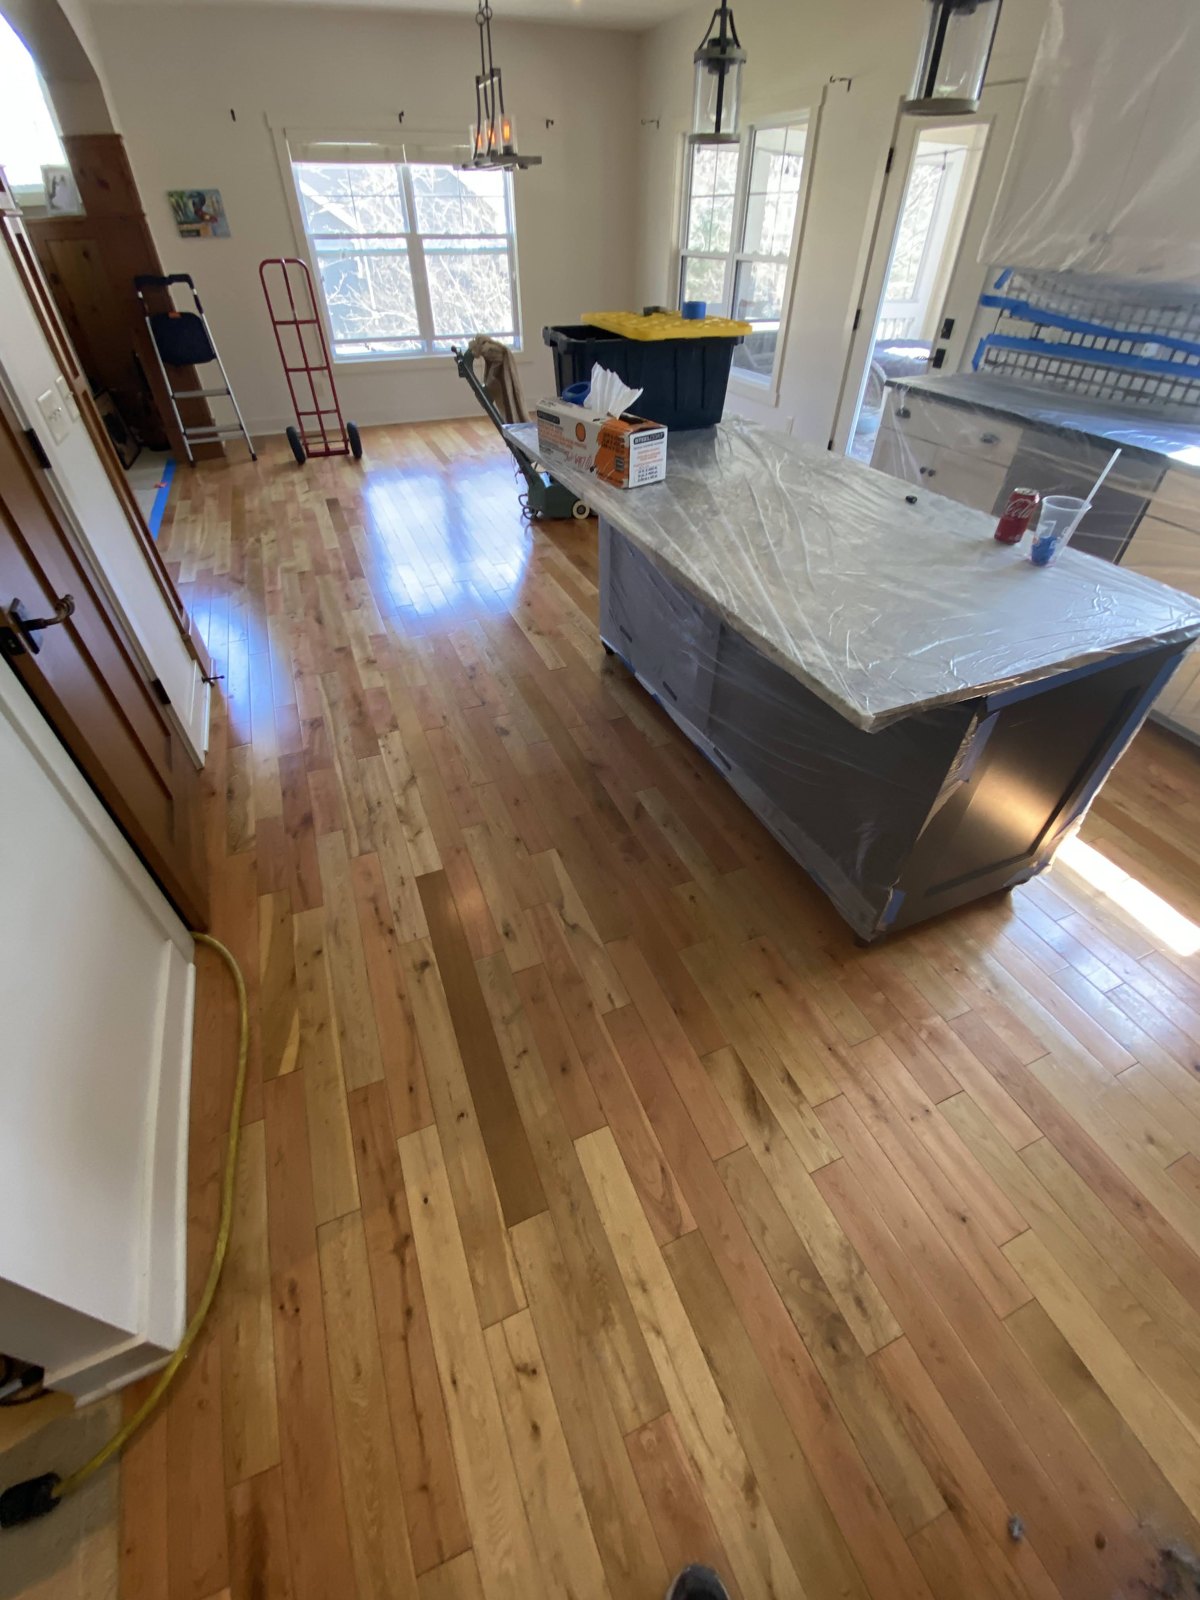
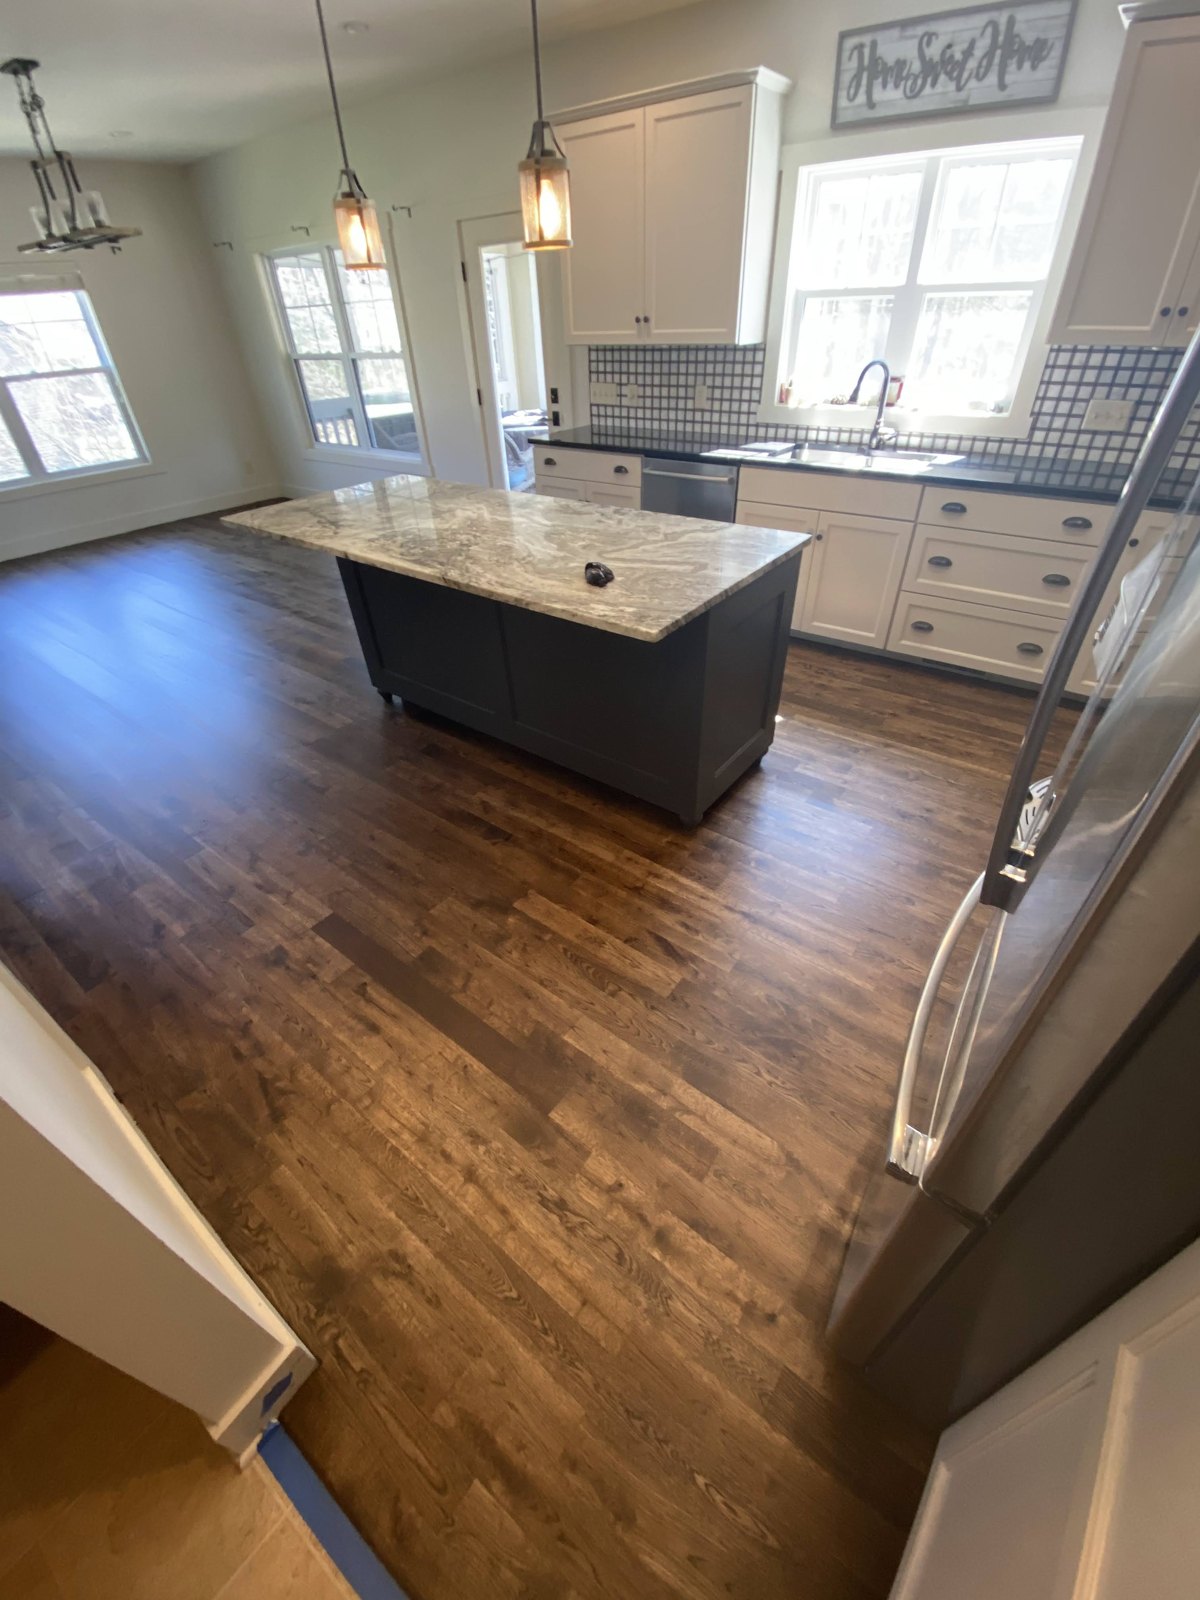
Prefinished oak takes on a different character through sanding, staining, and refinishing. This kitchen project shows the change from a lighter, warm-colored surface to a deeper brown that frames the island and white cabinetry.
Egypt Valley oak sanding, staining & refinishing
The starting point
The existing prefinished oak ran around a kitchen island and into adjoining areas. The earlier photograph records its light, warm appearance. Keeping the same kitchen landmarks in the comparison makes the change in floor color easy to see.
The work
The project album documents sanding, staining, and refinishing. It also shows cabinets and adjacent surfaces masked during preparation, followed by a series of stained-floor and finish-application views.
The result
The selected later photograph shows a richer brown appearance and visible oak grain alongside the white cabinets and dark island. This is a useful reference for homeowners considering a color change on existing oak. Camera angle, daylight, and finish reflections affect how the color reads in each photograph.
Choosing a stain for your home
Use project photos to explore a direction, then compare samples on your own floor. Wood, previous finish, sanding, and room lighting all influence the final appearance. Discuss the actual flooring and desired color before deciding on the refinishing scope.
Before & after
Selected photographs from this project. Tap an image to inspect the full view. Camera positions and lighting vary between photographs.